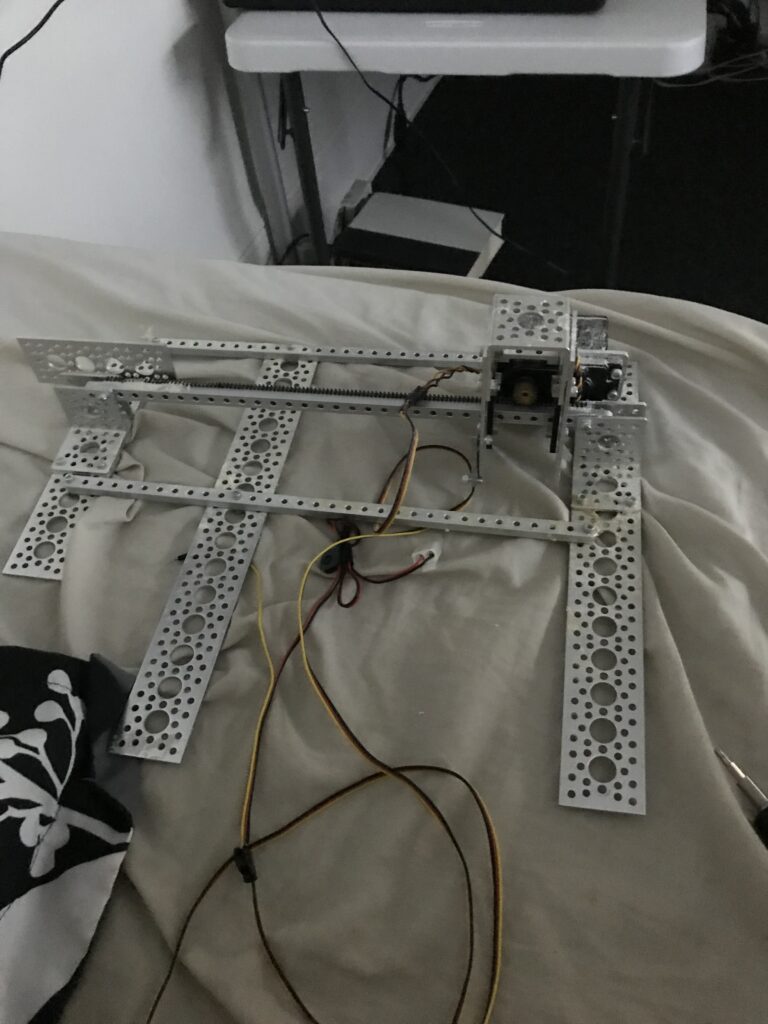
I lived a few stories up in my old Jones St apartment. I couldn’t buzz people in, and there was no functioning elevator. I loved to use apps like Instacart, Rinse, and Uber Eats to get deliveries, but I didn’t love making the trip down and up to receive those deliveries. This served as the creative inspiration for an automated crane system. I was pleasantly surprised at the response to the system, some delivery people expressed obvious joy at being asked to put the delivery in the bag that was lowered, and none ever expressed anger or disappointment.
Here you can see the crane arm in action, first going out and then going back inOne button at my desk opened and closed the window, another sent the crane arm out and backHere you can see the crane in action, hosting up delivery of fresh laundry from RinseHere you can see an early version of the winch being tested with the rotary encoder
Seems obvious in retrospect, but originally I didn’t think I’d need a crane arm to give adequate clearance from a small ledge beneath my window.
An L298n H Bridge proved very inadequate as a motor controller. On occasion, it would get too hot because too much wattage was flowing through it, and would need a few minutes to cool down before resuming operation.
The vibration produced by the cranes would routinely cause screws to come loose until I began to take additional measures to counter-act this.
Components:
2x Arduino Uno Rev 3 (one for the crane arm, one for the crane itself)
I built this to automatically refill my glass of water at my desk. It uses an HX 711 load cell connected to an Arduino to open/close a solenoid valve based on the weight of the glass of water. With no weight, it closes the valve. When the weight is between a minimum threshold and a maximum threshold, it opens the valve to let more water into the glass.
Here you can see the controlling arduino, as well as the solenoid valve, L298N for that valve, and power supply regulator for the arduino.
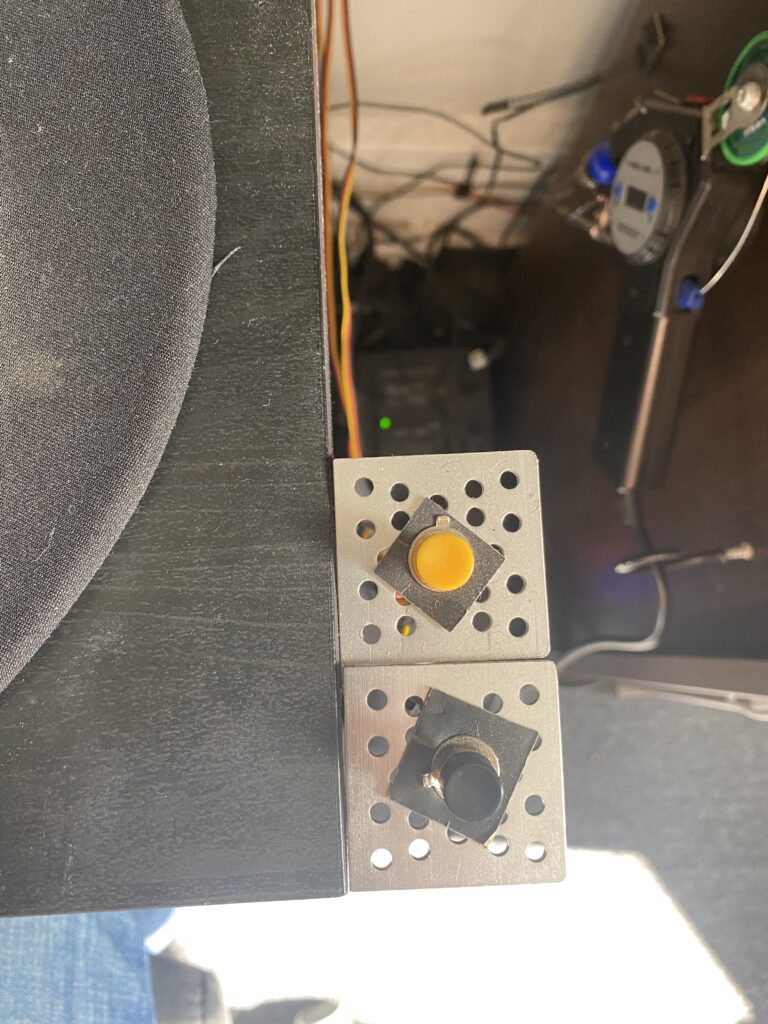
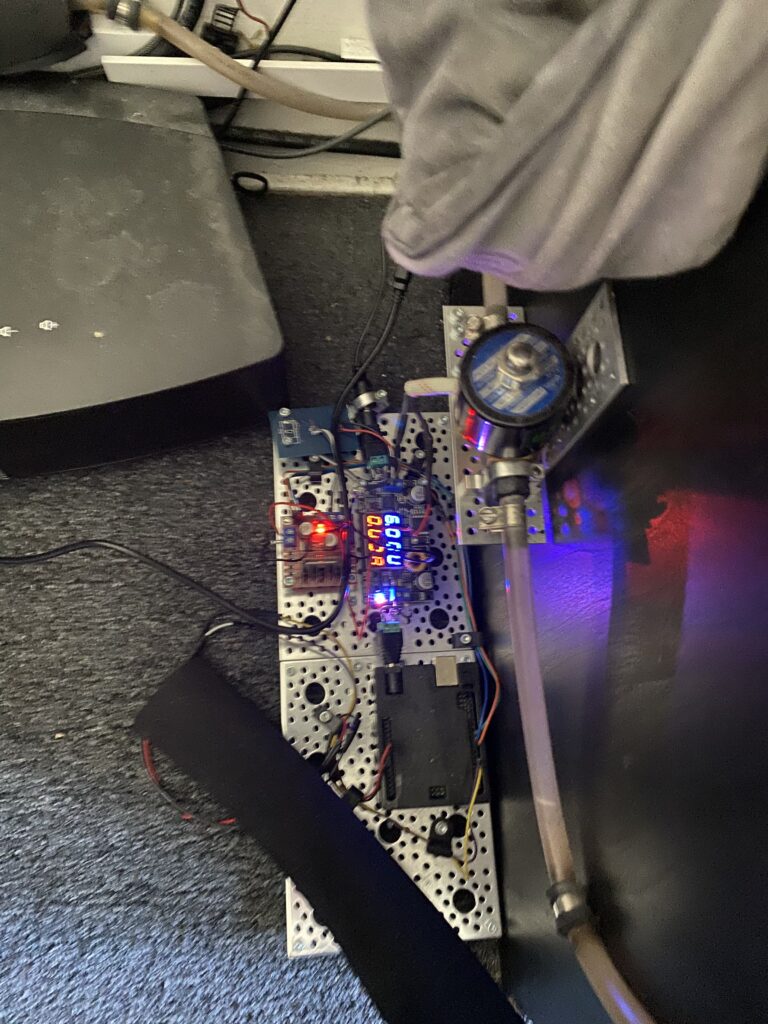
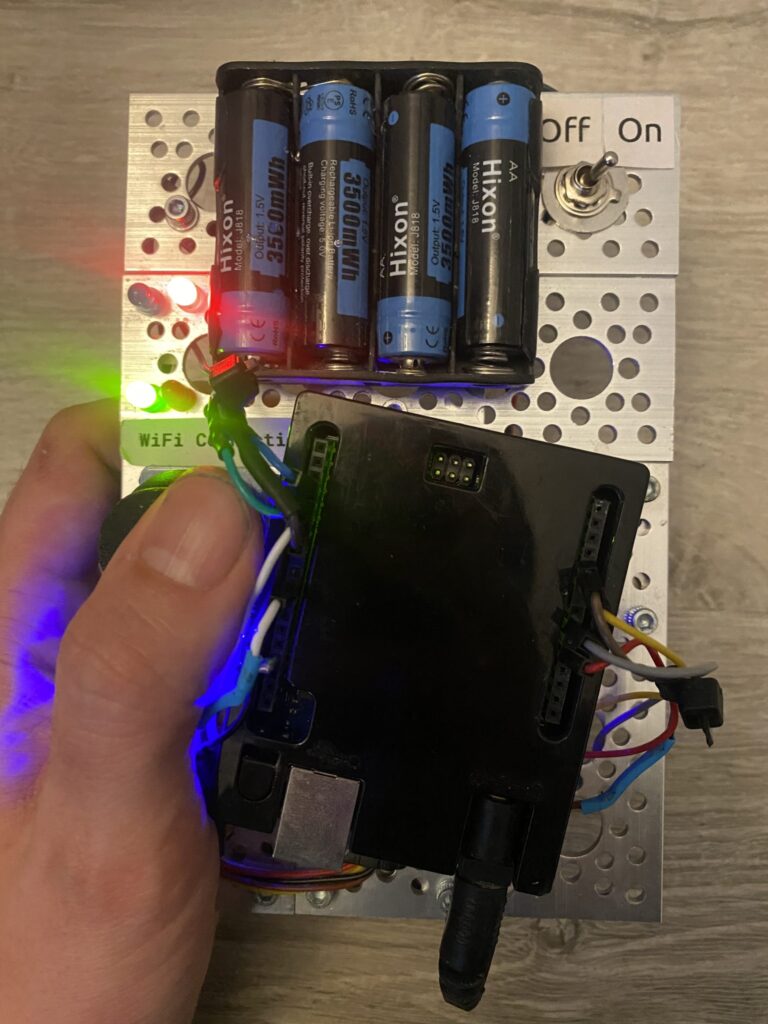
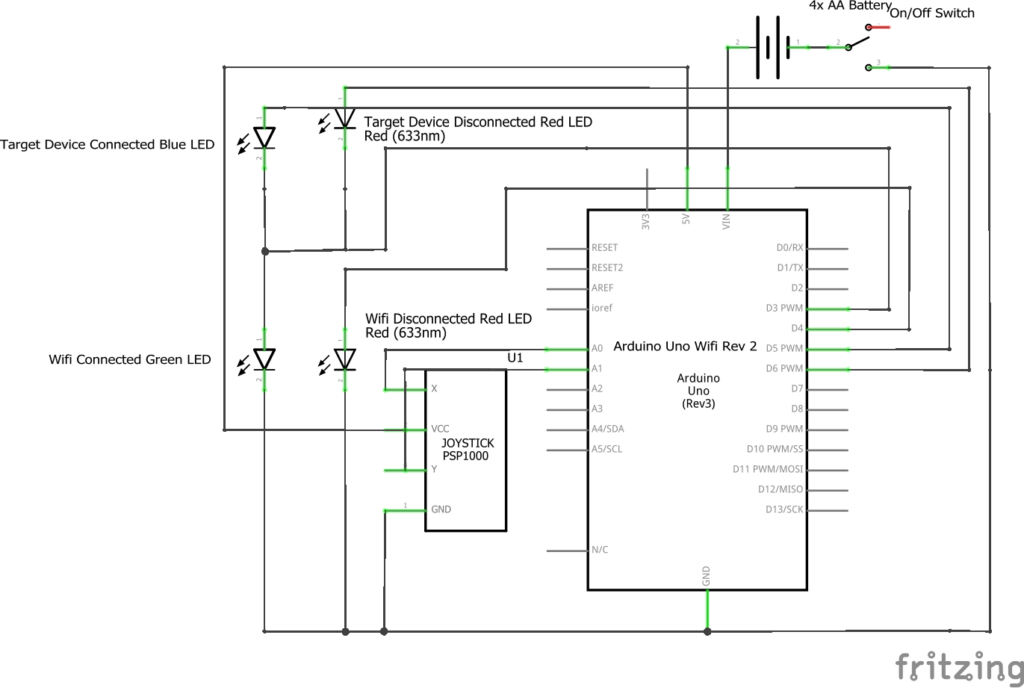
I wanted the option to control my Wifi remote-controlled car with a traditional joystick setup, so I made this.
Here you can see the controller in action, connected to the car via WiFi, to drive the car.Here is a close-up of the finished controller, you can see it is connected to the WiFi network but not the car via the LEDs on the left.
This remote was built to drive this remote control car. The JSON structure of its commands was intentionally built to be generic, however, so it could be re-used to drive other remote-controlled vehicles without needing to modify/reprogram it.
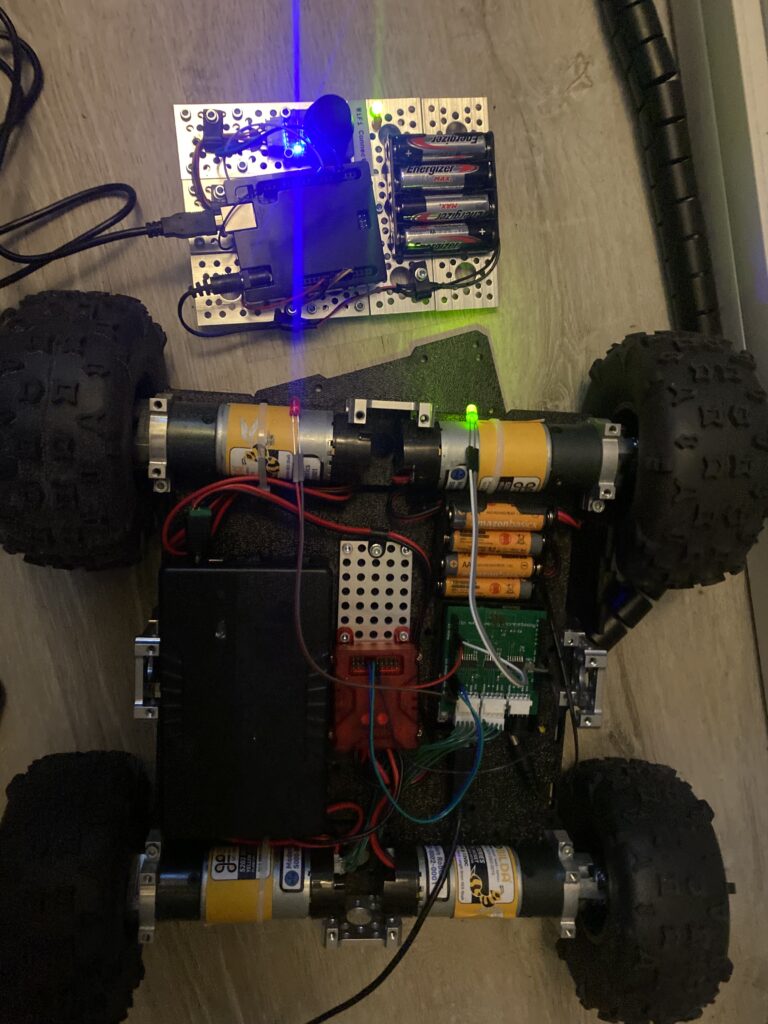
I wanted a remote control car that I could control via WiFI, in case I wanted to program it to do stuff over the network. I couldn’t find a commercial product I liked that did this in August 2022, so I made this.
This car was built to be controlled via this controller. However, the control architecture was built to be generic, so it could support different types of controllers. I wanted the ability to record commands sent to it via Joystick, and then replay them so I could program routes or patterns of movement for the vehicle in an intuitive way. The ability to program another Arduino to act as a controller to send a series of commands for fixed routes by the press of a button or on a timer was also desired.
Lessons Learned the Hard Way:
The plastic cover of the car had a surprisingly powerful effect on connection reliability. The maximum reliable range appeared to be only 5 meters/16 feet, even with a direct line of sight to the router.
Arduino Uno WiFi Rev 2 does not offer good support for external antennas.
To get a better reliable range it was necessary to completely refactor the design to something that offered good support for external antennas.
It would have been wise to read the specs for my motor controller more carefully, which also offered encoder support. This was unfortunately not realized until after I wrote code to use the encoder shield.
It would have been smarter to use a differential steering library instead of writing this functionality myself. I didn’t do it because it was easy, I did it because I thought it would be easy when I started.
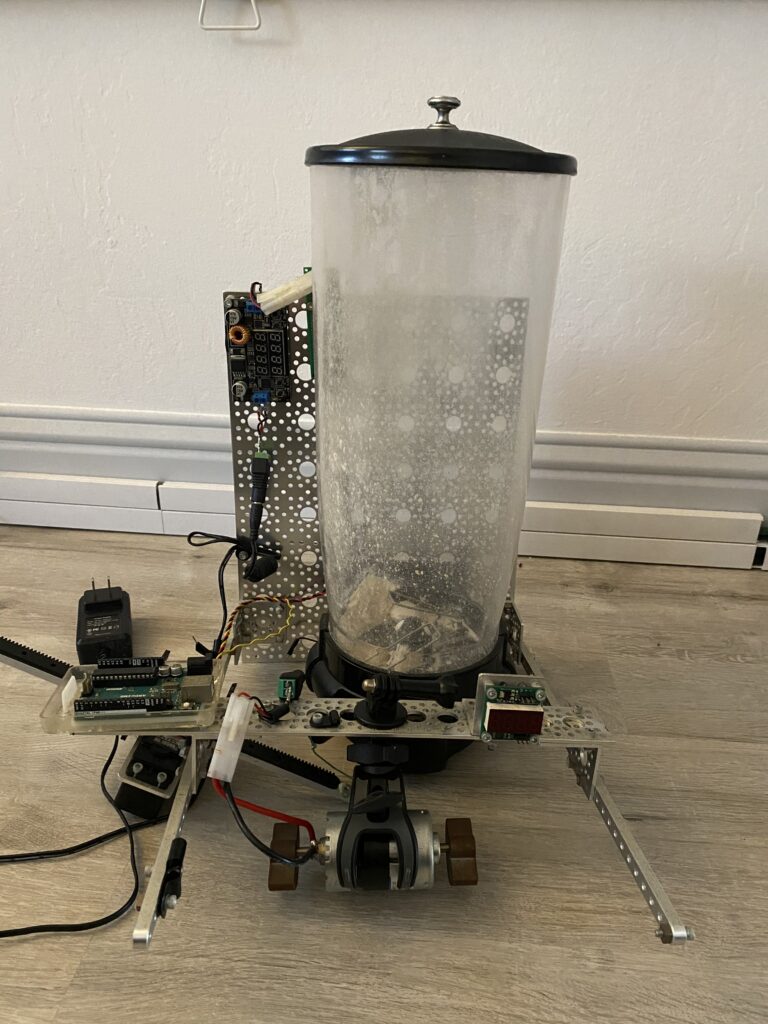
I enjoy drinking Soylent, the popular nutritional replacement drink. It is efficient in terms of money, nutrition, and time to create/consume/clean. I do not enjoy the process of manually making Soylent, which I found myself doing dozens of times per year. This sparked the motivation to automate the process, ideally with an Arduino, which was a new technology I was interested in exploring in 2017.
General Operation:
The moving platform moves the container between the powder dispensing and mixing stations about once per minute, about 15 times, in a process that completes in about 20 minutes. Once the container is filled with water and the process starts, it can proceed unattended and finishes automatically.
Source Code:
The source code for this project is available on Github:
Notice: I deliberately did not invest a lot of time in writing Clean Code because I wanted to focus on other aspects of the project. Be advised Uncle Bob would not look kindly on the above code.
Lower Level Components:
Here is the powder dispenser, in an inoperable form, taken in a photograph at a later date. The servo is controlled by a different Arduino Uno, which then moves the slider on the powder dispenser back and forth. The LED display is there to help with correctly programming servo motor values, and the big mechanical vibrator is attached front and center to make sure the powder doesn’t bunch up and stop flowing.The moving platform is intended to move the container between powder dispensing and blending stations. It uses a servo motor controlled by an Arduino to do this.
1. Fine Soylent powder had a tendency to clump unexpectedly within the dispenser, causing it to stop dispensing entirely on occasion until I knocked the dispenser unit to break it free. This was eventually resolved by installing a strong mechanical vibrator to automatically clear the clumps. This in turn caused issues keeping the screws in place, as the additional vibration had a tendency to knock them out of their sockets over time.
2. Lining up the blender head and the container reliably and accurately proved surprisingly challenging. It became necessary to put screws on the moving platform so that the container would fall into a specific place each time I placed it there. Lining up the moving platform and blender correctly took many iterations, and I eventually strapped on lasers to the blender head so it was easier to visualize exactly where it would drop down.
3. Dispensing too much powder into the container in a single pass could easily create a situation where the blades became completely covered in powder, and additional dunking/spinning would not clear them. This is the primary motivation for so many passes between powder dispensing and mixing stations.
4. Originally I wanted a station in the middle that would dispense water into the container in the right amount automatically during the start of the process. This was later cut because getting the process to work at all proved more time-consuming than originally expected, partly due to the above lessons as well as a general under-scoping of the project at the outset.